In this article, I will show you how you can implements integration tests using Springboot, test-containers and RabbitMQ.
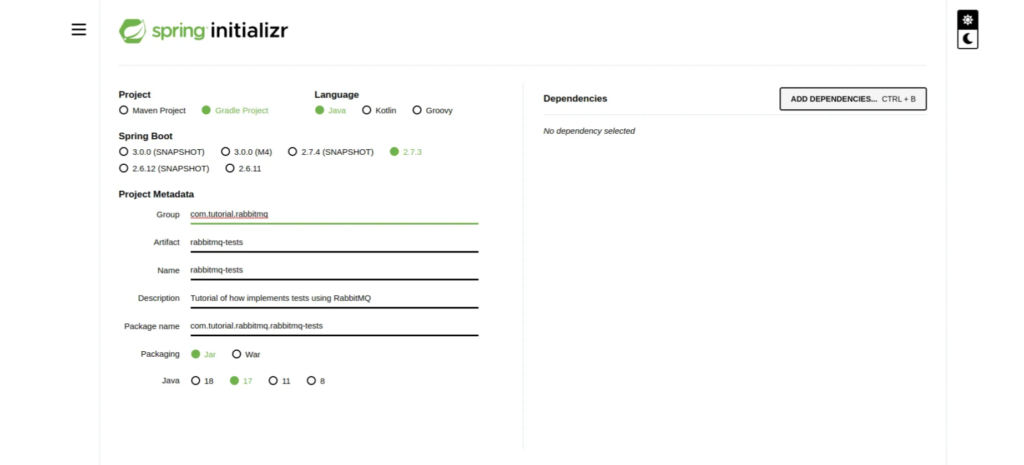
First of all, we need create something to test. We can use the Spring Initializr

Create implementation for testing
After you create a project, we will create a service to send some message and a listener to consume that message.
Inside our build.gradle we will add the following dependency.

The dependency above has all we need to create a communication with RabbitMQ.
Service and Listener
With dependency above, we are be able to create our Service that will send a message and our listener that will wait for some message.
Let’s start with our listener.

@RabbitListener is an annotation that marks a method to be the target of a Rabbit message listener on the specified queues() (or bindings()).
Notice the id property in @RabbitListener. It’s important and I will tell why on the right moment.
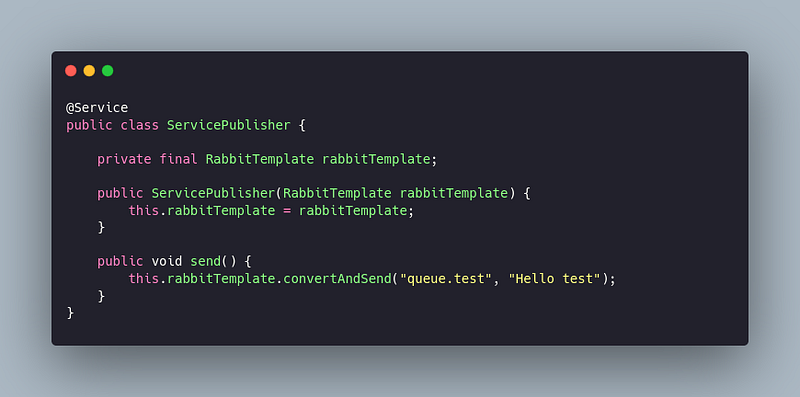
Now, let’s create our publisher.

RabbitTemplate is a helper class that simplifies synchronous RabbitMQ access (sending and receiving messages).
Application.yml
The next step is to configure our application.yml to connect in RabbitMQ.

The application.yml was created with environment variables properties because we will override then in our tests. It’s a good practice create our application.yml with environment variables to set differents contexts like application-integration-test.yml, application-e2e-test.yml, etc.
Creating tests
For our tests, we will need some dependencies.
The following dependency is to create our RabbitMQ container. So, in every test, a docker container will up with a RabbitMQ instance.

Other important dependency is Awaitility. This library make easy asynchronous tests.

The last one and not less important, we need a dependency to make easy our test containers.

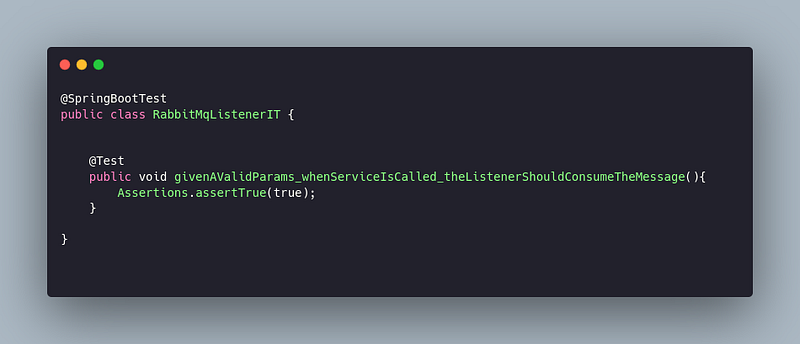
The next step is create our test class. Let’s create a simple Springboot test.

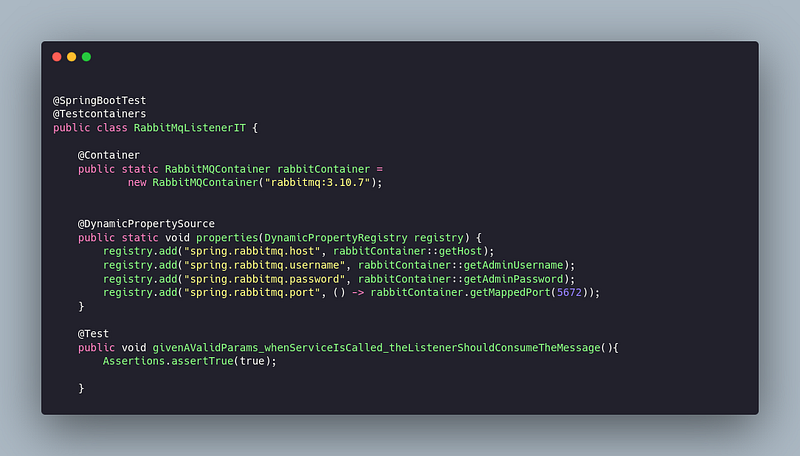
Now, we can annotate our test class with @Testcontainers and create our configuration for RabbitMQ container.

@DynamicPropertySource is to override the application.yml properties with the container configuration.
@Container is used for @Testcontainers to start the container. You can find more info about it here.
After create container configuration, we will inject the following Beans.

The first one is the RabbitAdmin . The purpose of this bean in our case, is to get some information about our queue.test.
The second one is the important because is where our listeners are registered. With this bean, we can listen or not some particular queue. In our case, we will stop to listen all queues and listen just the queue that we want to test.
The last one is our publisher that sends the message with Hello test.
Finally we can create the implementation of our test method.

Did you remember that the RabbitListenerEndpointRegistry is where the listeners are registered? So, in the line 1 we just stop all listeners to avoid side effects of others queues.
In the line 2 we create an assertion that ensures that we don’t have pending messages in the broker.
After that, in the line 3 we start listen the queue.test . Notice that the param passed to getListenerContainer is the ID’s listener.
In the line 4 we call our service that publishes a message to queue.test.
And finally in line 5 we create an assertion with awaitility that will check if the message has been successfully consumed. If 30 seconds have passed, the test should fail.
Conclusion
In this post I have shared with you my experience writing integration tests for RabbitMQ, Spring Boot and Test containers. I hope you have found the answers for your questions, the usage of the test containers and Awaitility library for testing asynchronous scenarios.
Surely there are many ways to solve this problem, so do not hesitate to share your experiences in the comments section.
Furthermore, I will be happy to answer any questions you may have!
